
Mesh to AI and Back - Generating Textures.
Like all blog posts so far (and this is no exception) I'm talking about AI and sharing some working examples. One of the biggest leaps AI has to take is that of generating 3D assets, I personally don't think its quite there yet, although there are a few companies out there that are getting closer.
I'm going to be discussing using a mesh that could potentially be used to animate a character. Something with topology that can be deformed with a rig. Most companies out there are creating a triangulated mesh created from a text prompt, these tend to be rather dense in terms of polycount with vertex colours. Others use an existing mesh (with UVs) and generate an AI texture for that mesh directly onto the UV's... I'll be using this method.
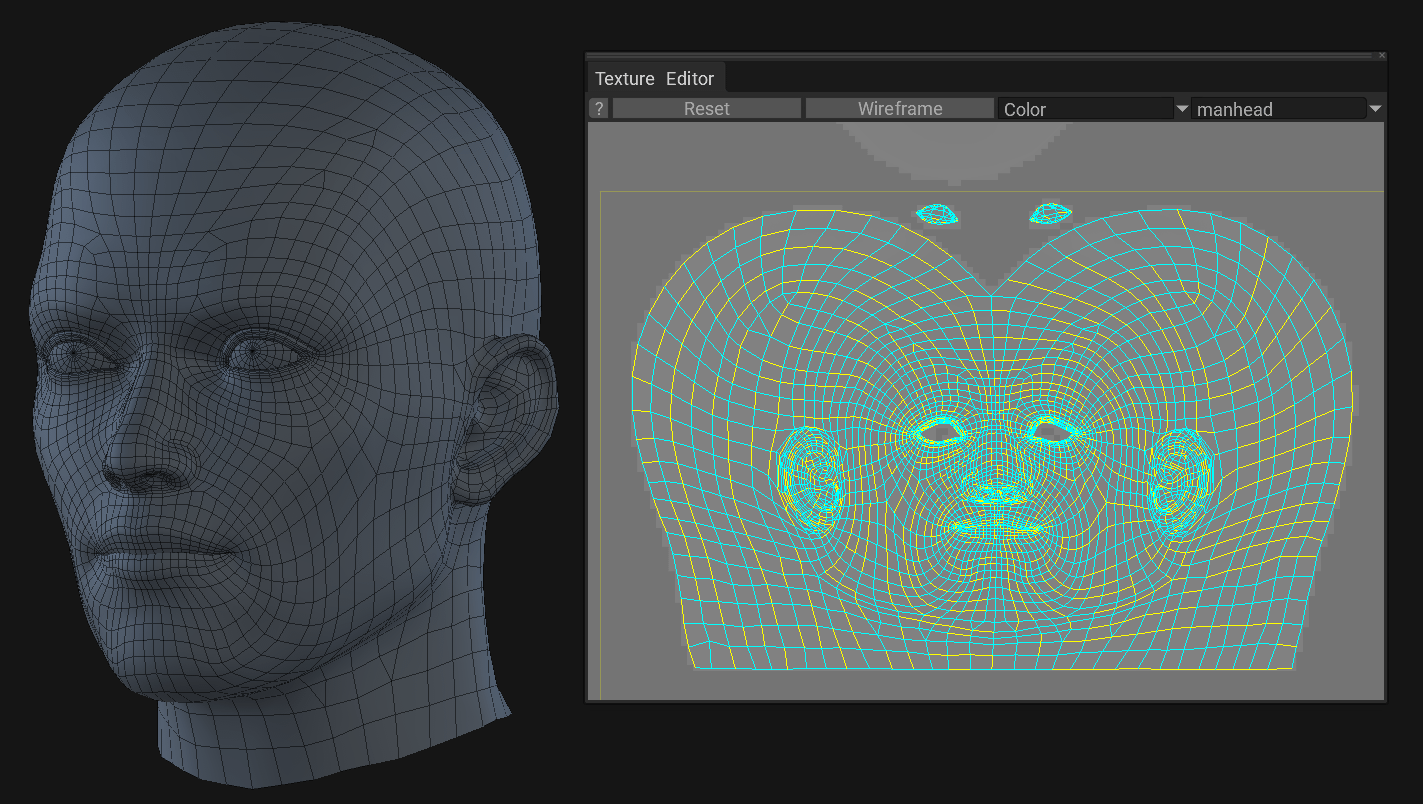
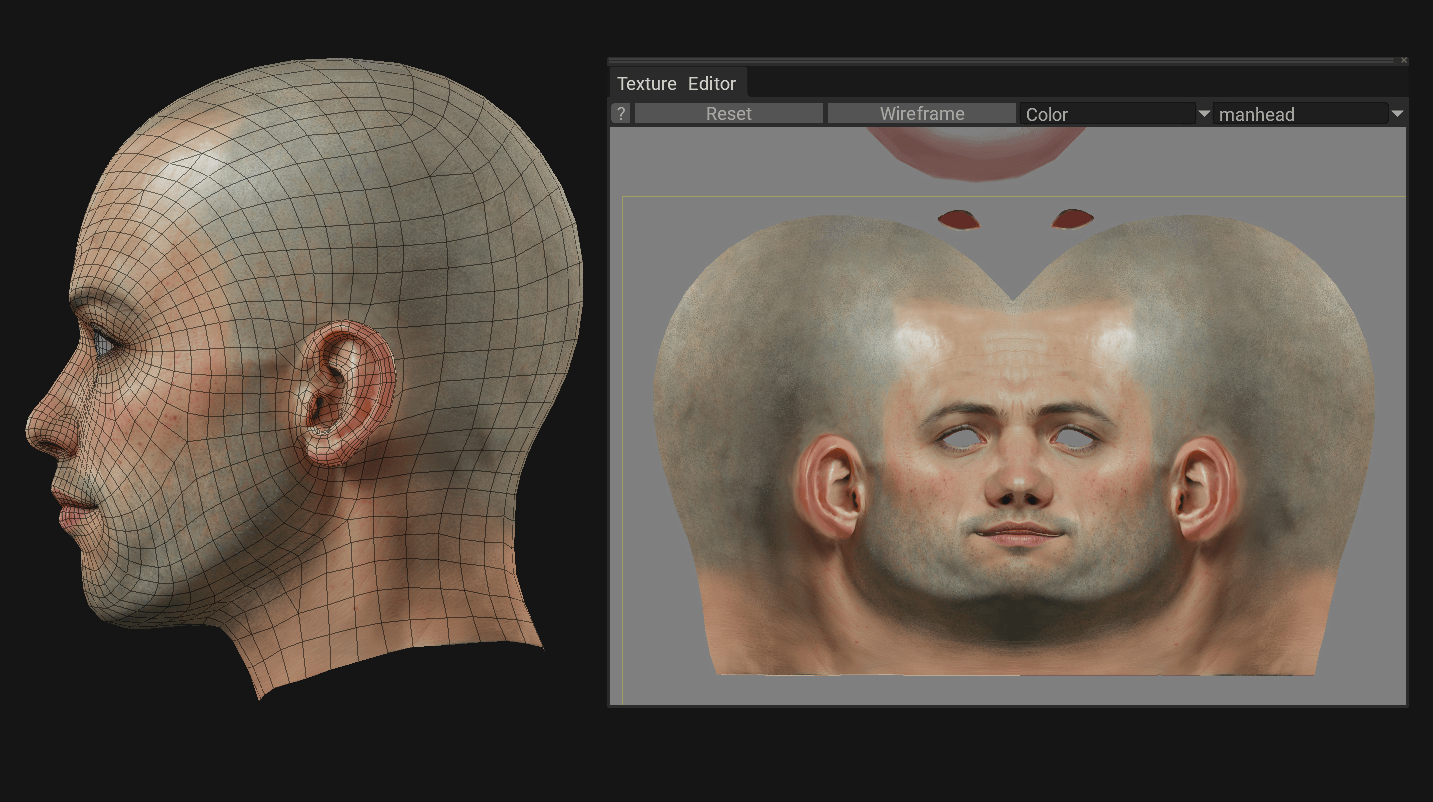
The example below is not a perfect mesh by any means, but it does have loops and has a very crude UV map to accompany it. Both topology and UV maps are very important and I would recommend going over to Ten24 and purchasing a mesh that has both already created (if that is, you don't want to make your own). Put as much effort into this stage as you wish... but for now, I'll go with this old one.
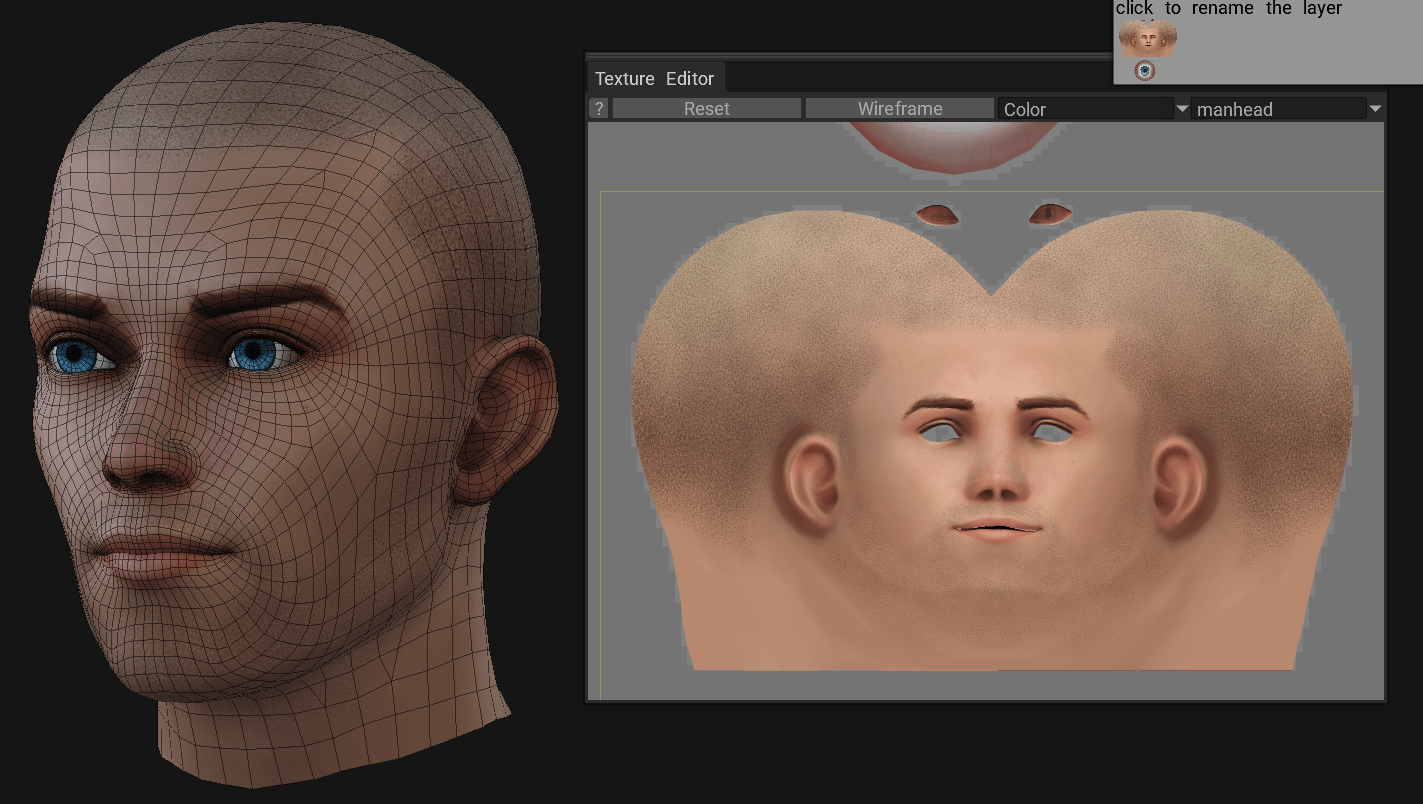
From here I create a simple texture using 3D-Coat. I don't need to add too many details to the texture, but I do try to get some colour variation in the skin and indicate where there is stubble on the scalp and beard areas.
So that's the basics, there is not much point in spending too long making a base texture as the result we're looking for is a new generated image. Giving enough 'noise' for Leonardo to work with is the key. At this point we could go in two directions. Firstly we could use the UV as the initial control image or we can use still images of the model from different angles and iterate on those.
Both are viable, however at the moment there are not many data sets out there that are trained on UV layouts. I will try and work on one soon, but for now I'll use the still images approach and create a separate blog post using a UV trained model.
Using the textured head model I create a series of renders at different angles. I won't bore you with all the images, just to say i set the render to orthographic and render the front sides and back. You can see the actual render isn't that detailed and rather flat.
Next I take the front image into Leonardo and create the prompt, specifying what I want to see. If I give Leonardo less room to be creative, then I get something similar to the original. However it looks like a 3D model with a plastic like texture to the skin.
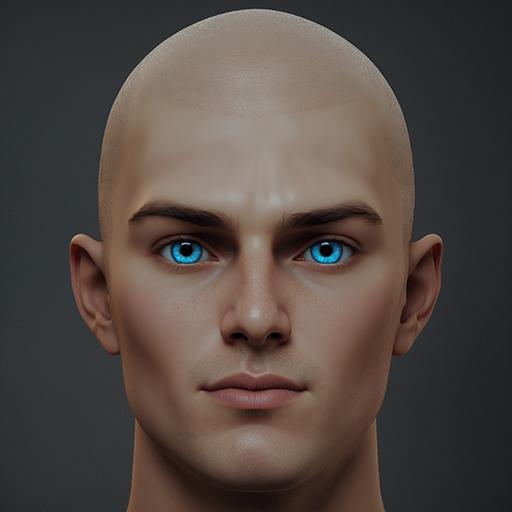
If I allow more freedom on the creative side, then following my initial image it will give me a more detailed, realistic result. This is more like what I'm after, but there's a small issue and that's the shadows. I can 'de-light' an image in post, but the challenge is to get AI to create and image with less shadows.
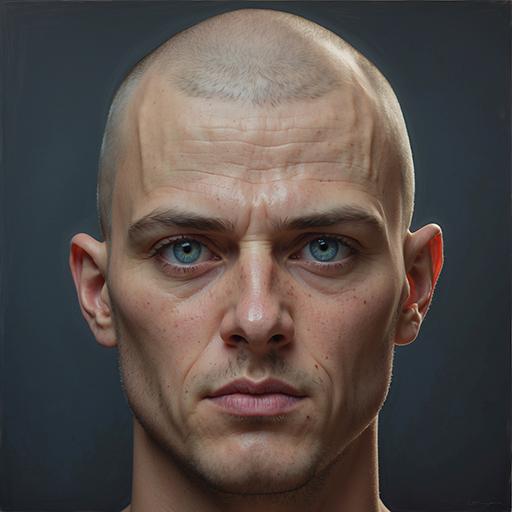
Leonardo does understand how to remove the shadows and in my case I used a Negative prompt to tell it what I didn't want to see. In this case - shadows. You can see the results below where it did remove shadow, making the skin more evenly lit. Of course it did decide to either amuse itself or just to mess with me and give it blue stubble! However these things are a good test of your patience and resilience :)
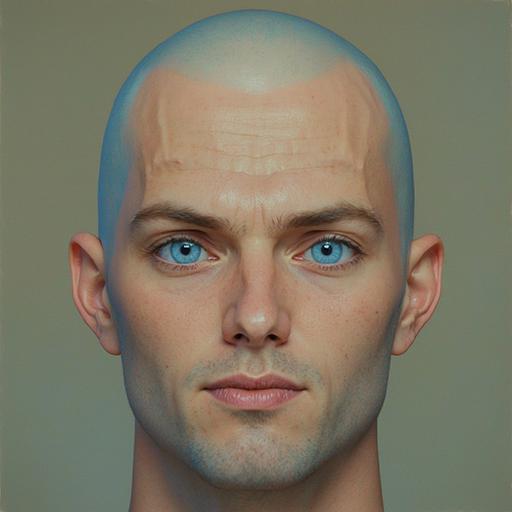
What you maybe able to see however is a consistency in the face its generating, particularly in the eyes and mouth. When you find that sweet spot then copy the seed for that variation and use the same prompt and seed on the other angles (tweaking the prompt, catering to the render angle of your image).
Next in your 3D app, you simply re-project the AI gen images back onto the mesh.
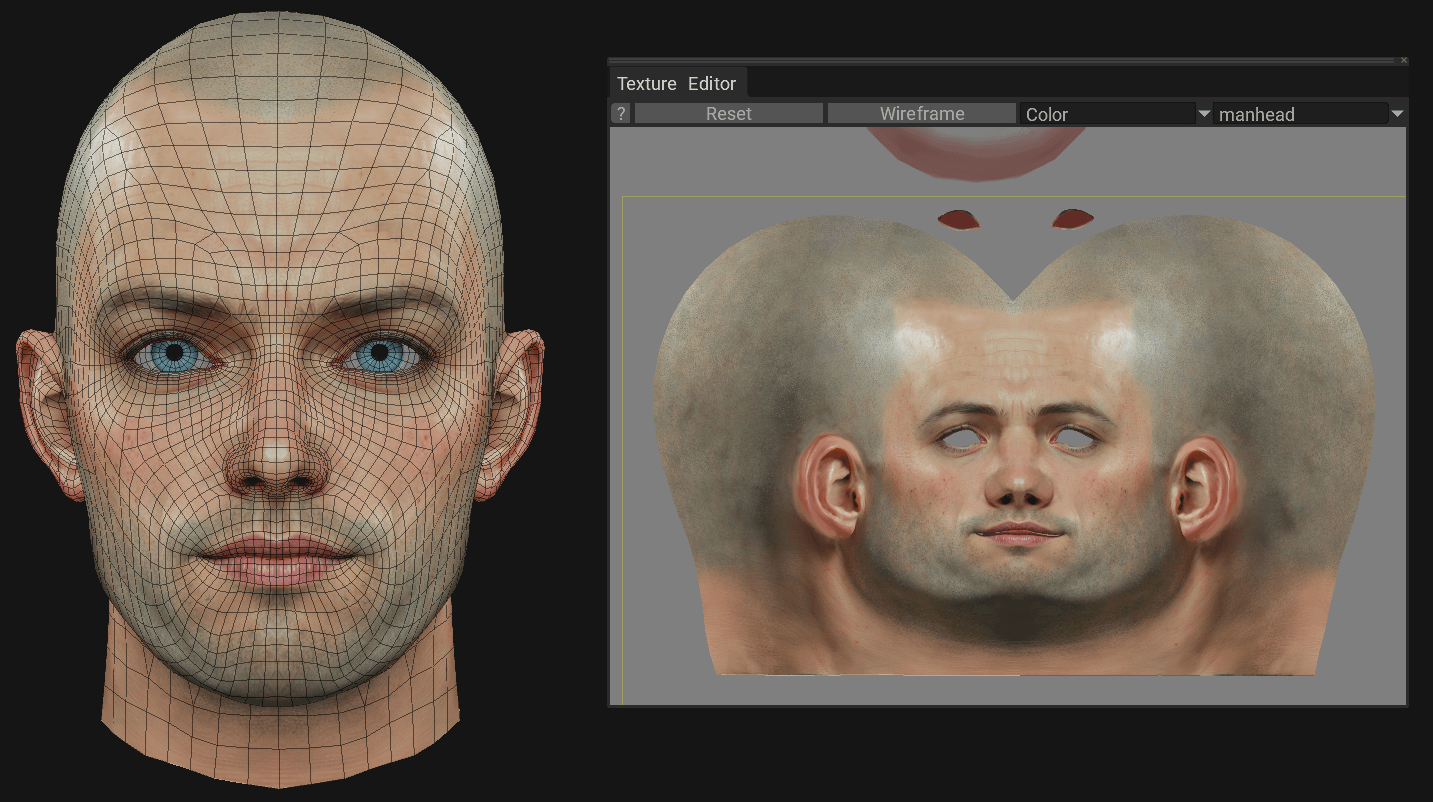
Use the different render angles and adjust the mesh angle to project the details back. Then you have to merge the image projections with painting and masking, for me this the fun part and perfect for an application like 3D-Coat.
Even though we specified removing the shadows, they are present along with highlights on the skin, we can refine this further, e.g. removing highlights in Photoshop. For now I'll leave that for another blog or maybe a YouTube tutorial. With extra work we can also extract normal map, specular and cavity details to take it further.
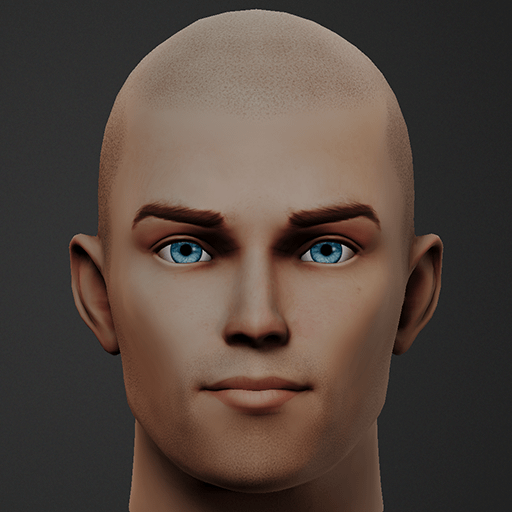
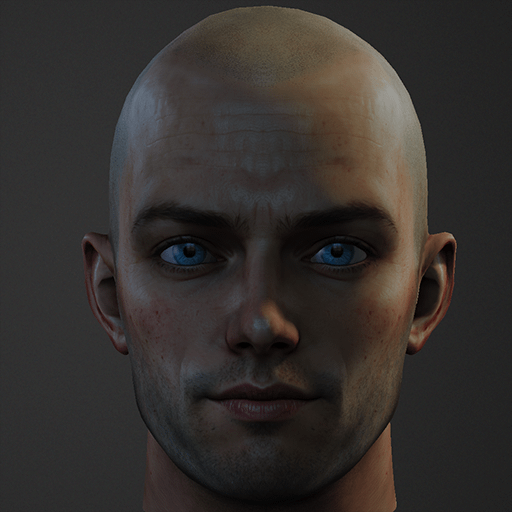
The results are fast, and variations are infinite. Here's a quick render with a few lights to give a dark, gritty look. Hope you found it useful.
Thanks for reading to the end. Leave a comment, I'd like to hear your thoughts.
Ian.
I'm going to be discussing using a mesh that could potentially be used to animate a character. Something with topology that can be deformed with a rig. Most companies out there are creating a triangulated mesh created from a text prompt, these tend to be rather dense in terms of polycount with vertex colours. Others use an existing mesh (with UVs) and generate an AI texture for that mesh directly onto the UV's... I'll be using this method.
The example below is not a perfect mesh by any means, but it does have loops and has a very crude UV map to accompany it. Both topology and UV maps are very important and I would recommend going over to Ten24 and purchasing a mesh that has both already created (if that is, you don't want to make your own). Put as much effort into this stage as you wish... but for now, I'll go with this old one.

From here I create a simple texture using 3D-Coat. I don't need to add too many details to the texture, but I do try to get some colour variation in the skin and indicate where there is stubble on the scalp and beard areas.

So that's the basics, there is not much point in spending too long making a base texture as the result we're looking for is a new generated image. Giving enough 'noise' for Leonardo to work with is the key. At this point we could go in two directions. Firstly we could use the UV as the initial control image or we can use still images of the model from different angles and iterate on those.
Both are viable, however at the moment there are not many data sets out there that are trained on UV layouts. I will try and work on one soon, but for now I'll use the still images approach and create a separate blog post using a UV trained model.
Using the textured head model I create a series of renders at different angles. I won't bore you with all the images, just to say i set the render to orthographic and render the front sides and back. You can see the actual render isn't that detailed and rather flat.

Next I take the front image into Leonardo and create the prompt, specifying what I want to see. If I give Leonardo less room to be creative, then I get something similar to the original. However it looks like a 3D model with a plastic like texture to the skin.

If I allow more freedom on the creative side, then following my initial image it will give me a more detailed, realistic result. This is more like what I'm after, but there's a small issue and that's the shadows. I can 'de-light' an image in post, but the challenge is to get AI to create and image with less shadows.

Leonardo does understand how to remove the shadows and in my case I used a Negative prompt to tell it what I didn't want to see. In this case - shadows. You can see the results below where it did remove shadow, making the skin more evenly lit. Of course it did decide to either amuse itself or just to mess with me and give it blue stubble! However these things are a good test of your patience and resilience :)

What you maybe able to see however is a consistency in the face its generating, particularly in the eyes and mouth. When you find that sweet spot then copy the seed for that variation and use the same prompt and seed on the other angles (tweaking the prompt, catering to the render angle of your image).
Next in your 3D app, you simply re-project the AI gen images back onto the mesh.

Use the different render angles and adjust the mesh angle to project the details back. Then you have to merge the image projections with painting and masking, for me this the fun part and perfect for an application like 3D-Coat.

Even though we specified removing the shadows, they are present along with highlights on the skin, we can refine this further, e.g. removing highlights in Photoshop. For now I'll leave that for another blog or maybe a YouTube tutorial. With extra work we can also extract normal map, specular and cavity details to take it further.
The results are fast, and variations are infinite. Here's a quick render with a few lights to give a dark, gritty look. Hope you found it useful.

Thanks for reading to the end. Leave a comment, I'd like to hear your thoughts.
Ian.