
Biped Mech Design - Sculpt to Ai
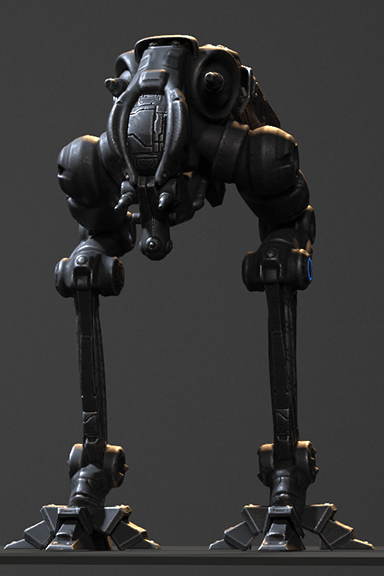
Mech Design used a primitive sculpt to block out shapes and I used a default shader inside 3D-Coat. Again setup a camera angle with a low camera angle and reduced perspective, next positioned a few lights and hit render (Image 1).
I placed a ground plane to try and ground the object, the lights really helped to define the shapes in the render (its very important to make sure all the key elements of the design are readable). I did loose details on the upper guns, particularly the left gun and had to work on bringing these back in post.
Image 1
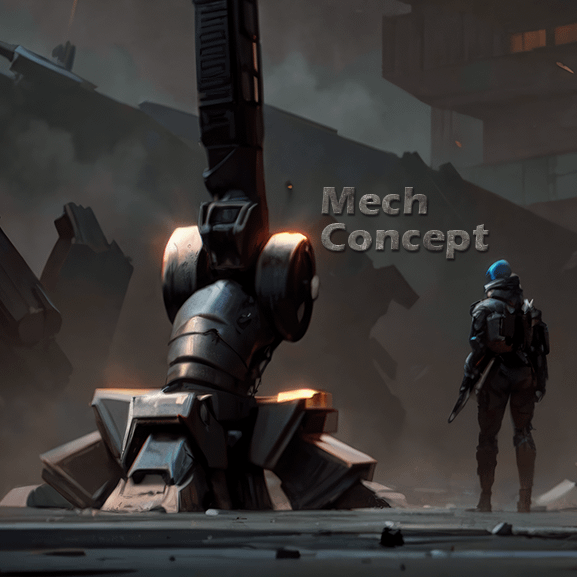
Once the render was created I then dropped this into Ai to try and polish the design and add more details. The final Ai image selected was (Image 2). As you can see the guns in particular were not being picked up by the Ai, this sometimes happens and you always have the original render there as a backup to revert these areas with a masking layer in Photoshop.
I also got lucky with the character reference which happened to be the correct scale. However I could have added a figure in the main render, painted it, or used in-painting to add the scale reference after... like I said got lucky and it saved a bit of time :)
Image 2
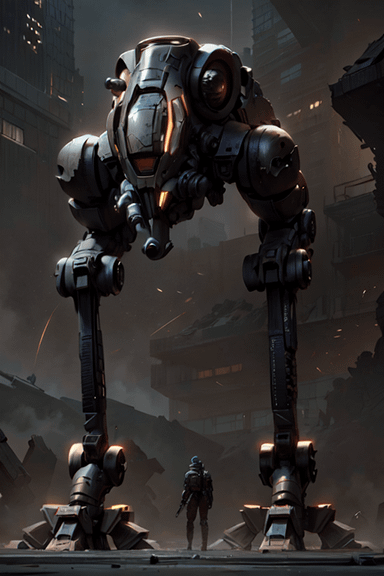
The image was painted over and as you can see, very little work was actually needed (Image 3). You don't have to be very precise with the painting, once you correct areas you can upscale using the same seed and Ai will smooth out and clean up shaky strokes.
Image 3
I placed a ground plane to try and ground the object, the lights really helped to define the shapes in the render (its very important to make sure all the key elements of the design are readable). I did loose details on the upper guns, particularly the left gun and had to work on bringing these back in post.
Image 1

Once the render was created I then dropped this into Ai to try and polish the design and add more details. The final Ai image selected was (Image 2). As you can see the guns in particular were not being picked up by the Ai, this sometimes happens and you always have the original render there as a backup to revert these areas with a masking layer in Photoshop.
I also got lucky with the character reference which happened to be the correct scale. However I could have added a figure in the main render, painted it, or used in-painting to add the scale reference after... like I said got lucky and it saved a bit of time :)
Image 2
The image was painted over and as you can see, very little work was actually needed (Image 3). You don't have to be very precise with the painting, once you correct areas you can upscale using the same seed and Ai will smooth out and clean up shaky strokes.
Image 3
